• Skip to primary navigation
  • Skip to main content
  • Skip to primary sidebar
  • Skip to footer

Create Scout

We scout around to find and share creative ideas to inspire you to create

  • About
    • Contact
  • One Sheet Wonder – Full Die System™
    • One Sheet Wonder -6×6
    • One Sheet Wonder – 6×6 Add-On
  • Create Scout Blog
  • Tutorials
  • Resources

Lynn Leusch

Scrapbooking – As A Fun Family Project

October 15, 2020 By Lynn Leusch Leave a Comment

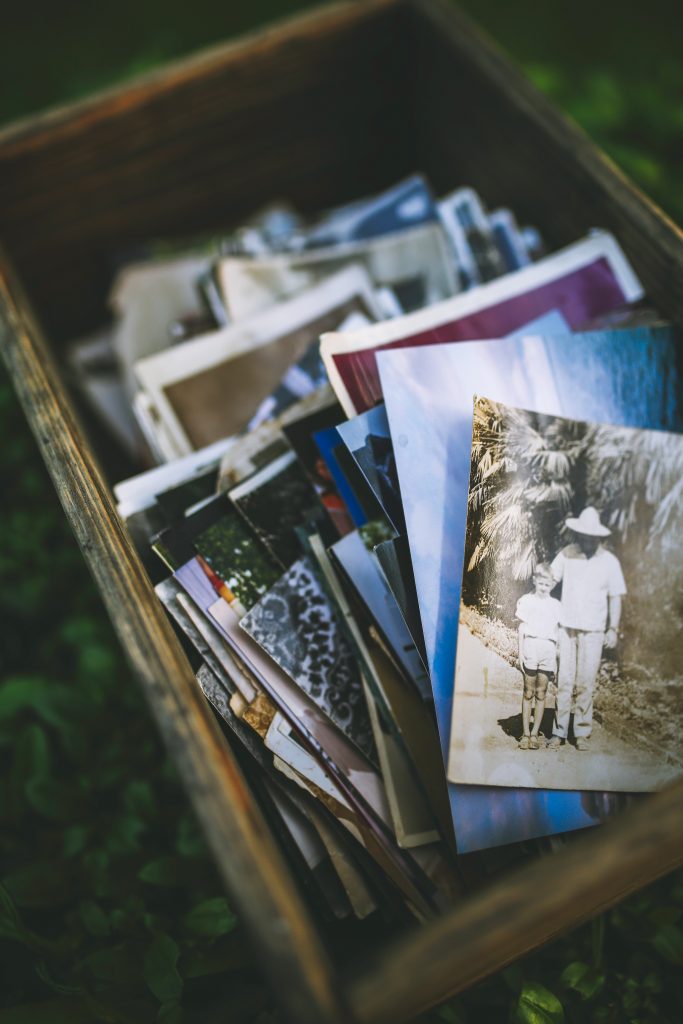
How many boxes of photos do you have stashed away in a closet or a drawer?

Working together to create an album of fond memories, is a fantastic way to spend a rainy afternoon or a cold winter’s night with your kids. Scrapbooking can become a favorite family activity.

You can use this family activity idea to put those pictures to good use instead of having them stored away in a box.

Whether it be a recent vacation, sporting event, birthday, holiday, or various other occasions, using your pictures to put a scrapbook album together is a perfect way to display your photos, while spending quality time together.

Use Acid-Free Materials To Protect Your Photos

Another benefit of scrapbooking your photos is using an acid-free system. Using a scrapbook album and paper supplies that are acid-free, protects your pictures from fading and discoloring. You definitely want to protect your photo investment and special memories with your loved ones.


We R Memory Keepers – Classic Leather – 12 x 12 – Three Ring Albums – Charcoal


American Crafts – Page Protectors – 12×12


Does This Sound Familiar?

You enjoy a great week at the beach, and return home to drop off your film for developing. After 2 days or so, you pick up the developed pictures and reminisce about your vacation and how much fun everyone had. The pictures are then placed back in the envelope and stored in a box (to be placed in a photo album at a later time). Several months or even a year goes by, and the photos are still in a box in the closet. Sound familiar? Maybe not to everyone, but many of us do something similar to this. Certainly not intentionally, but as we all know, our overloaded schedules sometimes prevent us from doing the things we mean to do.

Start By Scrapbooking A Recent Family Event

Please don’t let those photos sit around in a box for years to come. Schedule crafting and scrapbooking time WITH your kiddos. Let them help add those photos and create a beautiful memory book that they will remember for a lifetime.

Kids Love Helping

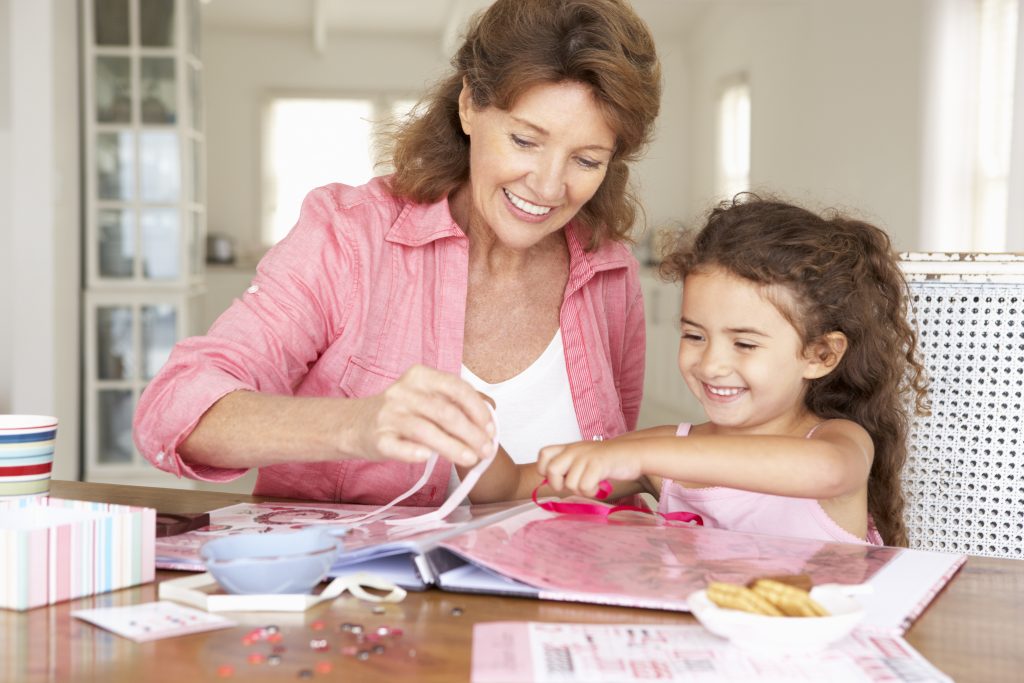
Kids love to sort through pictures, old or new, and help to create a family heirloom. There are many aspects of scrapbooking that children can easily assist with. For example, they enjoy using the special design scissors, picking out the photos and decorative paper, and applying them to the photo pages. The all-time favorite task, however, seems to be applying the fun stickers to the page. If the children are old enough, they may also like to journal the pages with captions or thoughts explaining the pictures or moods.

Enjoy Looking At Your Memories Together For Years To Come

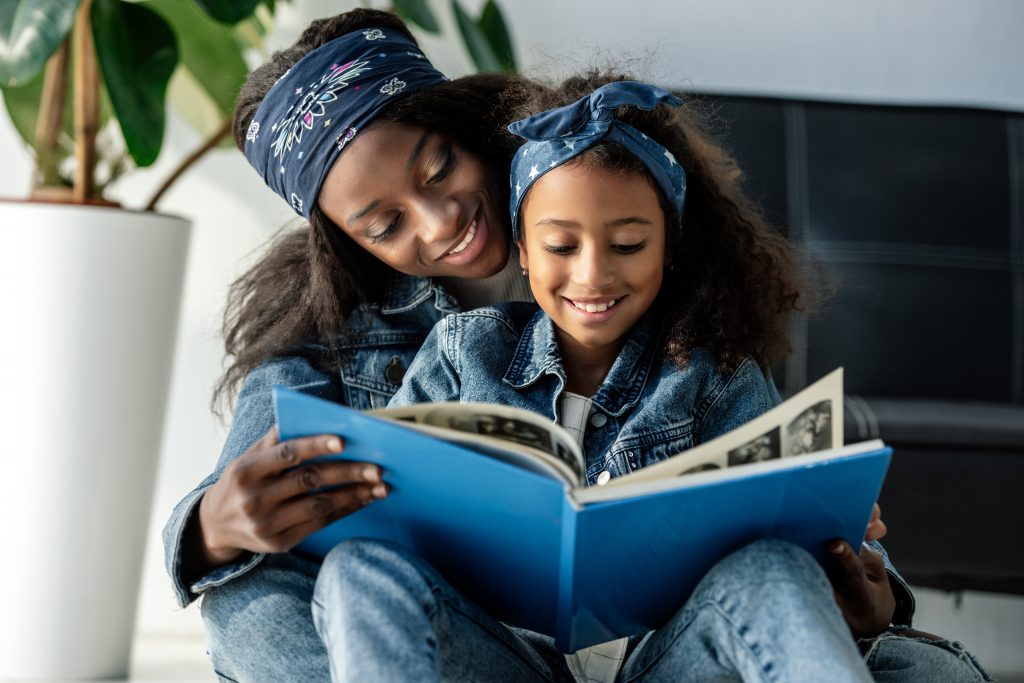
If your photos are placed in a scrapbook in a fun and creative way, you are more likely to store the album on a bookshelf or table. The scrapbooking album then becomes a great decoration that will be a wonderful conversation piece. After all, our most treasured times are with family and friends, and the photos that are taken at these moments, should be enjoyed.

Filed Under: Paper Crafts

Ai Watercolor – Christmas Ornaments with Kendra Krebs

September 25, 2020 By Lynn Leusch Leave a Comment

https://www.youtube.com/watch?v=EmYpJB6fmTE
[Music] hi everyone welcome back to art impressions watercolor wednesday
00:00:19
this is kendra krebs guest designer this week and i am bringing you this really fun
00:00:24
christmas inspired card and we are going to be using the art impressions watercolor stamps
00:00:30
to create these three beautiful ornaments so let's get started uh for this project
00:00:36
i'm going to be using the art impressions clear stamp set the j o n y as well as these little dots
00:00:44
um but this is just a small part of it so if you don't have these that's totally fine you can stipple
00:00:50
using your tombow or whatever uh water-based marker you have and then from the mini cabin set i'm
00:00:56
going to use this little guy right here although any of those cabins would be cute and then the watercolor tree set
00:01:03
this one right smack dab in the middle as well as the watercolor fur tree set and it's
00:01:10
just going to be these two right here so other items i'm going to be using
00:01:15
are is the molotov which as you can see i've already done here as well as the versamark which i used
00:01:23
for the um joy the embossing for the joy okay so let's get started i did the
00:01:30
really simple part first so i used the art impressions circle and oval
00:01:35
die sets to cut out uh the little shapes from the sticky paper so this is sticker paper from
00:01:43
i believe it's inkadew i can check but i'll link that below and then um the obviously the molotov
00:01:51
marker here so this does take a few minutes to dry so i went ahead and did it to begin with so let's go
00:01:57
ahead and get started and you may see me kind of pushing this down to reinforce the adhesive as we go
00:02:04
and that's just because the watercolor paper is textured and it tends to kind of lift sometimes so if
00:02:09
this is a problem for you you can always just die cut out the ornament from the watercolor
00:02:15
paper and then not deal with sticker paper at all if you want to do that totally fine all right so we're going to
00:02:21
grab our little structure and anytime we're doing snow on a structure we don't want
00:02:26
to ink the the top of the roof or the base here because it's going to kind of be sitting
00:02:31
in the snow and we're going to have some snow um it's not going to be an even line up
00:02:35
here it's going to kind of be piled up on top so i'm going to use the 565
00:02:43
and go ahead and come in and just begin to ink these areas here
00:02:51
and i'm going to get the windows and the sides but i'm not going to get the top or the
00:02:56
bottom inked okay so now that i've got that inked i'm going to come in and just
00:03:04
stamp it in here it doesn't need to be perfect that's totally fine and i'm going to take my brush and
00:03:12
begin to pull out some of these little eaves i want this to be dry when i come back to it because these
00:03:20
areas are going to be nice and dark so i'm going to do this before i add the snow to my rooftops
00:03:28
okay so that i can come back in and layer so i'm going to take that detailed tip
00:03:34
of the 565 same color i used to stamp this and i'm just going to do
00:03:40
a small little pile up of snow on top here and that's going to be piled as well
00:03:49
and then i'm going to do just a little line kind of here where the snow is going to
00:03:54
be sitting so on that one and then also here okay now i'm going to take my brush
00:04:04
again and on these lower areas i'm going to pull out that color
00:04:10
and just kind of get that going pull out this color ignore the little dots that you made earlier
00:04:20
those are going to be snow or stars if you want the stars to be up here you know if they're stars
00:04:26
you're just going to leave them up here if they're snow then they can kind of fall lower it's
00:04:31
totally up to you so i'm going to use the uh same color that
00:04:37
565 and then i'm also going to grab a little bit of the 969 just because i like how these two colors
00:04:47
blend i'm going to use mostly blue a little bit of brown and that's going to give me
00:04:53
kind of a grayish tone for my roof because i want this to differentiate from the rest of the
00:05:01
little cottage so i'm going to come in here and that's my little rooftop
00:05:12
okay just like that and then i'll come in and just add this little shadow in there okay so
00:05:22
i'm gonna come back in with a little bit of 565 and just darken both this side
00:05:30
little uh roof here and the side of the cottage because these two are pointing in the same direction
00:05:39
and they're both going to be darker so i want that nice and dark both of those okay
00:05:45
now i am going to take my brush and i'm going to pull in some of that 565 it's going to be mostly
00:05:55
565 on this project because it's it's snow so you're going to be using mostly that blue
00:06:04
and i'm gonna bring a little bit of that in there and then i'm going to use the 993
00:06:10
and i'll put this 993. it's just a little less a bit here um for the windows
00:06:18
so i'm just i'm not filling in the whole window when you do yellow as if there's a light on inside
00:06:25
you don't want the whole window to be yellow you just want to do a little bit otherwise it's it's kind of flattens it
00:06:31
out a little bit so you just want to i kind of just do the corner
00:06:36
and then if i want it to be a little bit darker then i can come back in with my detail tip and darken it up just
00:06:44
in that area okay and now i'm going to put in some of my snow
00:06:52
with the 565 you guessed it and i'm going to take this snow and i'm going to just do
00:06:59
a little hill right back here with that snow and then i'm also gonna do
00:07:05
a little bit of a hill on this edge and i'm just gonna kind of bring that
00:07:15
out same thing here okay and this is a good guide for us we can
00:07:23
change this if we want to we can soften it we can add shadows but this is a nice guide
00:07:28
for us to move with okay so now i am going to start adding in my little trees
00:07:35
okay so i'm just going to push that down again because we're going to need that to be nice and tight when we put in our
00:07:40
trees and our sky and everything so i'm going to take
00:07:44
that and you guessed it 565 again and actually i think this has some green on it so i'm going to stamp this off
00:07:55
nope not too bad so i'm going to just ink that basically that top half
00:08:02
and i'm going to start to stamp these in now if you wanted to mask this little snowy knoll you totally
00:08:12
can i didn't obviously but um i work with these a lot so i'm pretty
00:08:19
good at kind of knowing where they're gonna land but if you're new with these trees i
00:08:24
would suggest just starting off with a mask here because it's it is kind of
00:08:31
hard to um know where you're stamping sometimes okay so i'm gonna put a little mask on
00:08:39
my house here so i can stamp the trees behind and that again is the sticker paper
00:08:48
so i'm just going to stamp these little trees behind these projects can be so quick or you
00:08:55
can spend a good amount of time on them whatever you want to do and i'm going to take that off now so
00:09:01
now i have my little trees behind and i'm going to take my brush and start dabbing so i don't want to dab
00:09:10
everything i just want to dab some of it most of it maybe i'm going to come down to the little null here
00:09:20
okay and i'm gonna go right up to that edge that i drew for the snow and we'll just bring this up and we'll
00:09:32
bring this back below okay so do you see how that kind of sits up
00:09:38
right next to the snow and i'm going to blend in that line just a little bit more
00:09:44
and you can see sometimes there's a little line here that's left that's okay um it'll kind of blend out
00:09:52
all right and so now we've got our little house and then i'm gonna take one of the
00:10:01
little branches here and i'm gonna ink this in the 565 and just put some little branches out
00:10:08
front for the foreground and you can do this however you want and
00:10:16
make sure to stamp over the cottage because the cottage is gonna be set back so
00:10:22
that'll just help it sort of look like it's set back and um this is in the foreground here
00:10:30
okay i'm not gonna touch too much of it just a little bit to blend it in and you can see
00:10:34
why i need that edge to be nice and tight okay
00:10:42
all right so now i'm going to take that 565 and a little bit of if i can find it cuz
00:10:51
i don't want it near me a little bit of the n25 so this is the n25
00:11:01
and i'm going to mix just a little bit of that 565 with the n25 to give me a nice dark
00:11:09
blue it's going to just darken that blue up and i'm going to start up in here and just begin to
00:11:14
dab and this is going to be my sky of course and i don't want to get too close to those trees but i do
00:11:24
want it to look connected but i don't want him to be the exact same which is why i sort of added in
00:11:31
that n25 it kind of changes the tone a little bit too to separate the trees
00:11:39
okay take a little bit of that just 565 and i'm just dabbing just so that it's not a perfect
00:11:50
sort of wash of color you want things to kind of have some darker areas and some lighter
00:11:57
areas so we're just going to put this first layer in and we'll come back
00:12:03
and darken up the edges just a bit more but i'm just sort of moving in between the trees
00:12:12
and then maybe i'll grab some of that 565 again just plain and sort of put it in here
00:12:21
okay so i'm going to come back in to my snow and just sort of reinforce this line
00:12:28
a little bit it doesn't have to be too much because it is snow so really we're just
00:12:35
putting in the shadows of the snow and then i will take my twin tone this is my
00:12:45
little tombow twin tone and i'm going to use just that detail tip to put in some of the darker
00:12:55
areas here and i'm just going to darken up this makes it look really rich just it
00:13:02
helps that contrast so much and i just i love that and the contrast is nice and dark
00:13:13
okay so we're making progress here i'm gonna bring in a little bit of this just kind of under these trees you could
00:13:23
put little dots in here if you want to it's up to you however you want to do it okay now i'm going to take my brush
00:13:34
again and just sort of soften these lines just a touch
00:13:42
and just kind of bring that in and then we'll come back into this area up here with the n25 and a
00:13:53
little bit of the 565 and just around that very top region we're going to put
00:13:59
nice dark color in just like so okay and then i'm going to take
00:14:13
my brush and just do a little bit of this 565 and i'm going to kind of just come
00:14:20
around because we didn't put anything over here so i do want to um close the loop
00:14:27
of this um little oval so that when i take off the sticker paper
00:14:34
you can still see that this is part of the ornament you can do this or not it's up to you
00:14:42
you can leave it white and kind of let it speak for itself or you could do this and you don't need
00:14:48
a lot okay so before i take this off i'm just going to let this dry on its own
00:14:54
and then at the end we'll come back and we'll put in our little white dots for the snow and we'll take off this molotov
00:14:59
okay so i'm going to set this one to the side and then we're going to start with
00:15:04
our other two and we'll do the christmas tree first so the christmas tree is really really
00:15:11
simple these two are actually really really easy it just takes one stamp so
00:15:15
the stamp i'm gonna use is the other side of the little branches okay and this whole thing the tree and
00:15:22
the wreath is just this stamp and um number 249 so i'm going to take this and you can
00:15:32
see i kind of did my molotov dots in the shape of a tree so i'm just going to start by putting in
00:15:39
my little branches here and just kind of following the lines of my molotov and i'm going to move this around and
00:15:47
you can see i'm just inking just this little bit you don't need all of it
00:15:53
and sometimes stamping all of it you can kind of lose control of where your stamp is going
00:16:00
so i'm just going to kind of come around here and put these in
00:16:12
and same thing over here on the next little row all the way across so i'm just doing
00:16:23
layers and each layer is going to go a little bit further out than the previous layer
00:16:31
so this is going to almost go all the way to the edge there and i want to bring a little bit down
00:16:37
and same thing down here so that one is going to go to the edge and every christmas tree is going to be
00:16:46
a little bit different this one looks nothing like my previous one and i love it
00:16:51
because they're all unique just like you and i right okay
00:16:59
and then i'm going to put the little center little piece in just like that
00:17:07
so that's my little tree and i'm probably going to fill in some areas in the center just to kind of
00:17:14
connect everything but i do like using the same branch for this it's just
00:17:19
it's just easier to kind of manipulate this and you sort of learn how to use it when you're using the same
00:17:25
stamp you it's really easy to be like okay i'm you know i'm familiar with this stamp i can
00:17:30
kind of guide it where i want it to go okay so now
00:17:38
i'm gonna do since i'm using this one already i'm just gonna go ahead and go around my
00:17:44
little joy here with my wreath and this joy always reminds me
00:17:54
of my niece kendall because her middle name is joy and this season
00:17:59
is just such a reminder of what a blessing she is and of course my other nieces but their
00:18:05
middle names are not joy and actually my other niece's middle name is noel
00:18:11
so this season reminds me of her as well so so sweet i love being an auntie
00:18:19
okay i'm just gonna keep kind of moving around and i i really want to make sure all the the
00:18:26
blue dots that i put in they're covered because if they're not covered
00:18:31
then nothing's going to happen when i remove them they're just going to be white on white so you're not going to
00:18:37
see where they were unless they're covered in ink i'm just kind of moving around this is super easy
00:18:44
okay now i have my little wreath and actually i want just one little spot right there anyone else
00:18:54
recovering perfectionists i always say it doesn't have to be perfect but i'm also speaking to myself
00:19:00
okay so get your brush and we are going to begin to dab our little tree so i'm just going to
00:19:08
start dabbing and following [Music] the lines of the tree here just like
00:19:15
this and this would be a really cute like charlie brown tree
00:19:20
um project as well like wouldn't that be cute totally sparse little tree on an
00:19:26
ornament i think would just be adorable okay and i'm gonna keep going down just like this
00:19:38
who is going to be making their own christmas cards this year raise your hand leave me a comment an
00:19:44
emoji whatever you want to do if you're making your own cards give me some ideas
00:19:48
because i'm thinking about doing them again this year and i'm like i mean some of you know i've been like
00:19:54
absent for the last couple of months and i really want to get back into the creative spirit and so
00:20:02
i would love some ideas on what you guys are doing for christmas cards i really really would love to to get
00:20:10
back into it um and be able to do some this year and i haven't been able to the last couple
00:20:15
of years i just think it would be just a blast so give me some ideas i need you
00:20:22
okay so now i have my little tree um done and then i'll just come in and do i'm gonna make sure that's nice and
00:20:31
tight i'm gonna do my little ornament or my little wreath here
00:20:38
and just dab all around make sure you get right up to the edge of that sticker paper
00:20:43
so that you get a nice clean edge when you pull it off okay oh and by the way
00:20:54
this um embossing powder is from sparkle and sprinkle and this is called the gold tinsel so sparkle and sprinkle you can
00:21:05
check them out they've got a ton of really fun embossing powders they've got just tons
00:21:10
of fun stuff over there so check them out but this is this is their powder
00:21:16
and i used it with the versamark okay so i am going to just dab dab dab all around here
00:21:26
and i have now completed my dabbing for this part okay now i'm going to go ahead and remove
00:21:36
my little molotov dots from my tree because this is dry now make sure this is dry
00:21:45
please before you do this you do not want to run into any issues with wet watercolor paper and trying to
00:21:54
pull off your molotov you're not going to be happy it's going to be a sad day okay
00:21:59
now that i have that off i'm gonna use the 969 and go ahead and put in my little trunk
00:22:05
here it's just a little bit of a base there you can leave that off or put it on
00:22:11
whatever you want to do and now i'm going to begin to put in my colors so i'm going to use the 9
00:22:18
this is the 993 same one i used earlier and i'm just going to pick a couple little spots
00:22:28
to put these colors this is kind of the fun part where you can be like i mean it's all fun
00:22:33
let's be real but you can kind of be like oh i want you know a yellow here or a purple here
00:22:40
and this one is 173 but you can use any i don't know if we carry this one but you can use any
00:22:45
uh just bright green like limey green color okay obviously i'm going to do my red so
00:22:56
we're going to do the 856 gotta have the red in here right so this is the 856 and don't feel like
00:23:07
you have to put um you know an equal amount of colors if you run out of these little bubbles
00:23:13
that's fine you just put them next to the other colors oh this one is 636. this is that really
00:23:22
beautiful purple okay and notice i'm leaving a little highlight in the center of these right
00:23:30
so they're not all filled in and this is the 565 again okay maybe i'll put another one out here
00:23:43
and maybe one i don't know what do you guys think should i leave it i always tend to
00:23:51
overdo but i like to overuse so you know who else likes to overdo things okay i'm
00:23:59
gonna put this using the 993 i'm gonna put just this little
00:24:04
dots up at the top and that's where the bow will go so i just kind of liked to have this as
00:24:11
a background for the bow um you know again you can use this stamp or not this is the one i said
00:24:19
have it or not totally fine okay so i'm gonna take that 969 again and just
00:24:26
do a little bit and actually i want the detail tip here just to kind of pull that together
00:24:33
and then i'll put another little stamp over the trunk just so the trunk can kind of be buried a little bit more
00:24:44
i like it to kind of look like it's not just you know random okay so
00:24:52
now we're gonna add our ink to our water to this part up here
00:24:59
our little topper and we will add our little string so this is just a micron pen
00:25:09
and i'm just going to add a little string in here you know this doesn't have to be like
00:25:16
perfect and we'll just kind of move it around in here and essentially you're just
00:25:25
connecting the dots it's really really easy so just connect the dots there
00:25:31
and then if you want to go back in and add you know a few more you totally can i'm not going to
00:25:36
actually i think i'm just going to leave it as is and just kind of let that be and then
00:25:42
this one i'm going to now that it's dry this is also cute just leaving it white
00:25:49
so you can just leave in that cute just like that i love that but we're going to do the
00:25:54
red so this is the 856 again and i'm just doing red throughout these are just all going to
00:26:02
be red and we'll go here again trying to leave a highlight if you can
00:26:10
some of them may not have one that's fine okay and we'll do
00:26:20
one here and one here just gonna move all the way around just like that
00:26:35
cute aren't these cute okay so i'm going to oh we forgot this guy so i'm going to pull
00:26:42
these off now that this is dry okay so we've got our little snowflakes and these are kind of big
00:26:50
so i'm going to use the little uniball this is signo signo uniball and i'll just put a couple extra little
00:27:01
dots in here just because those molotov ones can be pretty big and i
00:27:07
like to have just a little bit extra here so i'm just gonna move around and i'll
00:27:15
get this closer up so you can see it and you can see all the little ones that i put in now
00:27:22
all right so i'm going to go cut these out using the same dies that i used to cut out the sticker paper and i will be
00:27:29
right back to show you the final results okay so here are the final little um ornaments
00:27:41
for our project today i hope that you enjoyed this and all you would have to do
00:27:45
is just put them on your card these two i popped up using pop-ups um and then of course the little wire
00:27:53
ribbon here for the um little bows so i hope you enjoyed this if you try it let me know
00:27:59
um check out the art impressions instagram page as well as subscribe um so happy to have
00:28:07
you here if you're already a subscriber and if you're not go ahead and click that subscribe button
00:28:12
if you like this video give it a thumbs up um and stick around for future videos

Source : Youtube

Filed Under: Paper Crafts

Don’t Limit Your Challenges! Challenge Your Limits!

September 16, 2020 By Lynn Leusch 35 Comments

Periodically taking on an organized challenge can help us to grow, stay motivated and inspired. Simply put, an organized challenge can be hosted by a person, company or a variety of sponsored organizers. They are often offered as a contest with the possibility to win prizes. The challenge organizer will usually give guidelines on a specific area of interest with a specific time frame to help ignite a spark to get you thinking outside of the box.

Depending on the type of challenge you accept can:

  • Remind us that we are stronger than we give ourselves credit for.
  • Prove to ourselves that we can make great things happen.
  • Help us clarify what we truly want in life.
  • Help us to be more appreciative of things we take for granted.
  • Give us that little nudge that is sometimes needed to do something we keep putting off.
  • Inspire us to learn new things. Helps us to grow personally, mentally and sometimes financially.

Lately, I’ve been seeing an increase in a variety of types of challenges across the internet. In conducting a challenge idea search I came across MANY different types of challenges to share with you. As you will see, you can potentially find a challenge for almost any subject.

30 Day Blogging Challenge
30 Day DIY GIF Challenge
30 Day Decluttering Challenge
30 Day Photography Challenge
30 Day Clean-ish Eating Challenge
30 Day Skin Care Challenge
30 Day Movie Challenge
30 Day Writing Challenge
Build Your Business Challenge
Beauty Challenge
Skills Challenge
Lego Challenge
Journaling Challenge
Cooking Challenge
Self-Care Challenge
Month-to Month Challenge
Age Appropriate Change
Scripture Challenge
Bible Reading Challenge
Reading Challenge
Drawing Challenge
Painting Challenge
Art Challenge
Scrapbook Page Challenge
Card Challenge
Sketch Challenge
Keep the Kids Busy Challenge: https://picklebums.com/christmas-challenge-cards/ (Great idea to keep kids busy while moms are working on other projects)
Doodle Challenge

Look at all of these challenge ideas that you can select from. Just by doing a Google search and typing in key words for the type of challenge you are interested in, you can locate many to choose from.

Google Search: Challenge Ideas

Google Search Challenge
Numerous challenge possibilities

Of course…the creative side of me is always looking for new and fun ways to use my crafting supplies. So here is a plethora of craft challenges to keep me inspired.

Google Search: Craft Challenge Ideas

Google Search: Craft Challenge Ideas

I discovered this post from Laura at papercraftidea.com where she has an excellent description of a variety of craft challenges that you might want to check out.

For all on my visual learners, I created a Pinterest board specifically for Creative Challenges of all types. Have fun browsing all of the ideas to get your creative juices flowing.

Stretch Yourself Challenge for Online Businesses

As you can begin to see there are so many types of challenges that you can participate in that can inspire you to grow in all areas. One of my absolute favorite annual challenges is the Stretch Yourself Challenge (SYC) hosted by my business coach Kelly McCausey from Love People Make Money. This is a live challenge offered every year in September.

Even though the live portion of the Stretch Yourself Challenge is closed, it is still available as a self-study course and is well worth taking the time to select and work through the individual challenges to help you build a business. The only difference between the live SYC and the self-study course is that you don’t have access to the weekly meetings, points and prizes. But, don’t let that stop you from looking into this opportunity, especially if you are looking for a little kick in the behind to get going or need a little extra love and support via the online forum that is available to challengers.

This Marketing Business Challenge comes with an in depth and value packed guidebook that includes 21 different individual challenges and checklists to choose from. Kelly knows that each business owner enters into this challenge at different stages of development and will take on the challenges differently. So there’s a little something for all online business types.

The cost of just one training for a step-by-step marketing subject could easily cost the same or more than what the entire Stretch Yourself Challenge costs. For only $57 you will have lifetime access to the challenge guide along with the community group to help answer questions.

If you have a business or are considering starting a business, I highly recommend the Stretch Yourself Challenge.

*This content contains affiliate links.

Filed Under: Paper Crafts

Mother’s Day Spa Day Gifts

May 2, 2020 By Lynn Leusch Leave a Comment

Want to help Mom pamper herself on her special day? Make her some homemade bath salts. They will help her relax and leave her skin feeling great.

Making homemade bath salts and scrubs are not difficult at all, and provide a thoughtful and loving gift.

By using just a few household ingredients and drops of essential oils of your choice you can easily create your own scrubs and bath salts.  Add the bath salts or scrub to a cute little jar, attach a tag and you will have mom grinning from ear to ear.  Make these gifts extra special by adding a gift card for a full spa/massage day, or movie and lunch date
together or any number of things that you know would make MOM feel special.

Bath Salts

Mix
3 cups of Epsom salts
2 cups of baking soda
1 cup of table salt
Add about twenty drops of a fragrant essential oil. Lavender, sandalwood and chamomile are good choices. Mix thoroughly.

Present the bath salts to Mom in a pretty jar tied with a ribbon.

Body Scrub

This spa day scrub created by Laura from Make Life Lovely, combines Rosemary and Mint to    make this luscious gift. The full tutorial and recipe is on her site. Oh yeah, she also provides the printable to create that cool tag.

Suggestions:
Find an adorable jar to fill with the Rosemary and Mint scrub
Add ribbon, twine or raffia of your choice to tie around the jar lid
Attach printed tag (found on Laura’s site) or create one of your own

Mom is sure to appreciate either one of these simple yet thoughtful gifts. It will give her fond Mother’s Day memories for years to come!

Filed Under: Paper Crafts

Give the Essence of Easter

April 6, 2020 By Lynn Leusch Leave a Comment

Give the gift of Easter lilies.

Easter lilies are one of the most popular of all holiday plants. They are gorgeous little flowers that will bring joy into the home of anyone who is lucky enough to receive them.
If your home needs a little oomph this year then pick up some Easter lilies and if you are invited to an Easter dinner or Easter party, consider bringing along some Easter lilies to give as a hostess gift. They will simply light up the room!

Lilies are wonderfully versatile. They can be grown in your home for as long as you want, and do not ever have to be planted outside if you don’t want to. However, if you do decide that your garden needs a beautiful enhancement, then you can simply plant them in the garden when the weather gets a little warmer. They will change the entire look and feel of your garden. They will add a light and airy feeling filled with love and hope. That is the magic of Easter lilies and why so many people have fallen in love with their lovely little trumpets over the years.

Tips for choosing an Easter Lily Plant

So how do you choose the Easter lilies that are right for you or someone close to you? It is easy, follow the tips below and always come away from the store with the perfect Easter lilies for any occasion.

  • Look for lots of healthy green leaves.
  • The more leaves that the Easter lilies have on the plant the healthier they are going to be.
    • These leaves should be plentiful all around the plant and should go right down to where the Easter lilies meet the potting soil in the pot.
  • Do not choose the Easter lilies with the already blooming flowers.
    • Many people make the mistake of choosing the Easter lilies that already have many open buds.
    • If you buy them already bloomed in a couple of days those will have died and there will be no buds to take their place.
  • Try to choose one with a couple opened and even more unopened. This way you will be able to enjoy your Easter lilies much longer.
  • Choose the Easter lilies that look good on all sides
  • Try to choose the Easter lilies that look just as pretty from the back as they do from the front.

Filed Under: Paper Crafts

Cookie Exchange Time – But It’s Not Always About The Cookies

December 6, 2019 By Lynn Leusch Leave a Comment

It’s holiday cookie baking and eating season. YUM! Isn’t the aroma of freshly baked cookies one of the best smells ever? It’s also the season for invitations to participate in cookie exchanges and swaps. I love these because I get to try a variety of tasty cookies that I normally would not have made or tried.

The great thing about a cookie exchange is that you bake a designated amount of one kind of cookie and swap them with friends.  After the exchange is completed you end up with an assortment of cookies to nibble on.

Typically when an invitation is accepted to participate in a cookie exchange there are some basic questions that need to be answered.
What kind of cookie will I bake?
How many dozens (or half dozens) will be needed?
When will I start making and baking them? (of course being a great procrastinator, I know I’d wait longer than I should have)
How will I package each set of cookies?

I’ve participated and organized several cookie exchanges over the years and some of the funnest ones I have participated in were not always just about the cookie.  Yes, you read that correctly, it isn’t ALWAYS about the cookie. Sometimes, it’s about the container the cookies are placed in that makes the difference.

As I was going through some Holiday Memory photos I came across some photos of a Holiday Cookie Exchange that I had participated in. One of the biggest factors involved in this particular cookie exchange was about designing and creating the container that each set of cookies were placed in. This wasn’t just a plate of cookies covered with plastic wrap and a bow or placed into a little box. No, the containers were unique creative designs. Not only would you bake the yummy cookies, but you were committed to create something that would be sure to get some festive cheers from all who were in attendance. Over the years the competition got pretty fierce. The bar was set high to be in the running for one of the fun prizes. And, YES there were prizes for best tasting cookie (of course), but the most coveted prize for me was for the best container and container display.

My submission for that particular year, I brought in a mini lighted Christmas tree and placed each set of my cookie presents under the tree.


My cookie box presents were inspired and designed around the 3D tea bag boxes that can be found by many creators online. I took the online inspirations and made some adjustments to the size of the box to fit the size of my packaged cookies. Each of the cookies were individually placed in a little bag along with a tea bag and a little Ande’s chocolate mint. I placed the stamped bag topper onto the baggie and stapled them individually shut. The lid came off so each individually wrapped cookies slid inside.  For each treat you would simply pull it out of the box for a little cookie, mint and tea time. I was really pleased with how these came out. There were a lot of great entries that year, but guess what? I won the prize for best cookie container/display that year.

I found a good tutorial over at Splitcoast Stampers, If you are interested in how to make these tea bag dispenser boxes.

Hosting a Holiday Cookie Exchange (Swap)

Determine which date you will host your cookie exchange. Keep in mind that December is typically a very busy month for many people due to holiday parties and gatherings. Because of these busy schedules, consider hosting the event at the beginning of December rather than closer to Christmas. Other things to consider is that weeknights are not typically as busy as the weekends because so many people work during the week, so keep all of these things in mind when deciding which date is best.

Logistics.
Determine the time and length of your event and how many guests you want to have in attendance, based on the amount of space you have available. If you are offering activities other than just the cookie exchange you will want to make sure there is enough room to enjoy the scheduled activities. Ask yourself if you will you be providing a full meal, appetizers, or just punch and simple nibbles.

If you are offering activities, what kind of activities will you offer?
Certainly you could play some Holiday themed games, sing songs, etc.
As creative individuals it’s always a fun idea to offer a make and take project that each of your guests can create and then end the event with the cookie exchange. This has always been a fun event for me in the past. Have guests bring their personal crafting tools.

Will you be offering prizes for best tasting cookie or any other feature of the exchange? If so, make sure your guests know so they can plan to bring their best game…

Consider setting a theme for your event.

Send Out Invitations. Whether you send out traditional invitations, make phone calls, send texts or create a special Facebook invitation page, it’s important to give enough lead time for people to sign up so that you can determine how many cookies each participant will need to make. Let the guests who have given a R.S.V.P to you, know as soon as possible, how many cookies are needed.

NOTE:
Typically guests make a dozen cookies for every attendee, but due to more and more people being so busy, it has become popular to request a half dozen cookies for larger group attendance.

Let invitees know what they can expect during the event hours. Will food/snacks be provided? What drinks will be offered? Other than the cookies for the exchange is there anything else that attendees need to bring? Will it be a potluck as well?

Have each participant bring the cookie recipe of their creation. This is always a favorite of attendees, because inevitably someone wants to know how to make a certain batch of cookies.

Create guidelines.
Experience shows that setting some cookie exchange guidelines and rules is important.  These are not intended to be a downer on the event, but are intended to prevent any possible issues going forward. Here are some suggestions for your consideration (word them how you feel most comfortable):
– cookies should be made from scratch (no boxed or store bought dough or cookies are allowed).
– if you sign up for the cookie exchange you must follow through – everyone is depending on you following through with your commitment.
– if something happens and you can’t make it to the day of the event, make sure your bring your cookies ahead of time.
– each batch of cookies should be packaged separately.

Ideas for event set-up.
Make a list of every task that needs to get done for the day of your event. Mark things off as they are completed. This will help you stay on track

I’ts OK to keep your holiday decorations to a minimum This can help keep the holiday rush and stress to a minimum as well.

Set aside a special display table for the guest to place all of their cookies. The table should be a large enough area for all guests to place their cookies on when they arrive.

Do as much food and drink prep and set up as possible.  Prepare as many items as possible in advance. If some of your nibble items are in the freezer, set a reminder to pull them out in time

Consider asking your bestie to be a helper on the day of the event so you can do some of the last minute items that can’t be done ahead of time. Your friend can help greet and welcome guests and get them comfortable when they arrive.

The most important thing to remember when hosting a Christmas Cookie Exchange is…HAVE FUN and enjoy yourself alongside your guests.


Filed Under: Paper Crafts

« Previous Page
Next Page »

Primary Sidebar

Recent Posts

  • Ways To Be Creative
  • Creative Decorating Tips From A 5-Year-Old
  • Playdough Playtime – Family Style
  • Glue Gun Essentials – Tips, Tricks & Hacks
  • One Sheet Wonder Valentine’s Day Cards

Recent Comments

  • Atlas_2022 on How To Read A Ruler
  • Glenda Cates on Creative Decorating Tips From A 5-Year-Old
  • Martha on Creative Decorating Tips From A 5-Year-Old
  • Tamara on Playdough Playtime – Family Style
  • Karen Sammer on Playdough Playtime – Family Style

AFFILIATE DISCLOSURE

Sometimes I make recommendations for books, journals, calendars, other products and resources. The link provided, in many cases, is an affiliate link. This means if you click it and purchase, I will earn a small commission when you take action on a recommendation but you will not pay more. I only promote things I personally use, test, and believe in.

Footer

Meet The Blogger

My desire to scout around and discover all forms of creative outlets has led me to introduce you to Create Scout. It takes so much time to discover and find new inspiration, so here at createscout.com, I will work hard to find and bring you the old, the new, the trendy and innovative ways to make pretty things.

Copyright © 2025 · Hosted by Mom Webs Hosting · Log in