• Skip to primary navigation
  • Skip to main content
  • Skip to primary sidebar
  • Skip to footer

Create Scout

We scout around to find and share creative ideas to inspire you to create

  • About
    • Contact
  • One Sheet Wonder – Full Die System™
    • One Sheet Wonder -6×6
    • One Sheet Wonder – 6×6 Add-On
  • Create Scout Blog
  • Tutorials
  • Resources

Blog

Ways To Be Creative

February 1, 2022 By Lynn Leusch Leave a Comment

Today’s post is one that brings me pride.

I started 2022 by taking on a challenge to post to my blog every day for the entire month of January. According to my calendar…it’s January 31, 2022. That means…Goal Accomplished!

There were some days that I was working up until the clock turned 11:59 pm, but by golly I did it. Ok…there were two days that I didn’t post until another day, but with the completion of this post, I now have thirty-one posts within thirty-one days.

Challenge Taken – Goal Accomplished

This challenge was a great kick off towards a productive and creative New Year. I sitll have 11 more months to discover new techniques and create so many pretty things.

I decided to join this challenge for one BIG reason. To kick my year in gear and build excitement and inspiring others towards being more creative in 2022.

There’s a part of me that wonders that since I just created 31 posts, am I going to be able to to have enough creative ideas to continue? LOL

There were many days, when I had no idea what I was going to write about, but thankfully got inspired by a variety of different actions. There were times when I started writing about one thing and the final post ended up about something completely different. That’s the beauty of creativity. It’s very fluid and often comes out of the blue.

There is so much to learn and when creativity is manifested.
Learning to be more confident
Learning new techniques
Learning to deal with fear and rejection
Learning to manage time better
So much more…

Ways To Be Creative

Photo by Tim Mossholder from Pexels

No matter what your skill level or creative genre, being creative can come in many forms. Sometimes it comes from having serious thought and sometimes just being a bit silly, will bring about some pretty amazing ideas.

Below is a random list of ways to bring about creativity:

Commit yourself to creativity

Make something from an online tutorial you’ve had bookmarked for some time

Make a tutorial from something you created yourself – share it with a friend

Clear off your entire workspace and then reorganize it – However, don’t put anything back tin the same spot – changing your creative view can open your eyes to new things

Carry a notebook and pen with you everywhere you go – jot down things you observe

Fill an entire photo album with anything but photographs – This is of course AKA a scrapbook, but totally think outside of that box that everyone keeps talking about

Use your paper scraps in new ways OR throw them away – Both ways can bring change which opens up new ways of doing things

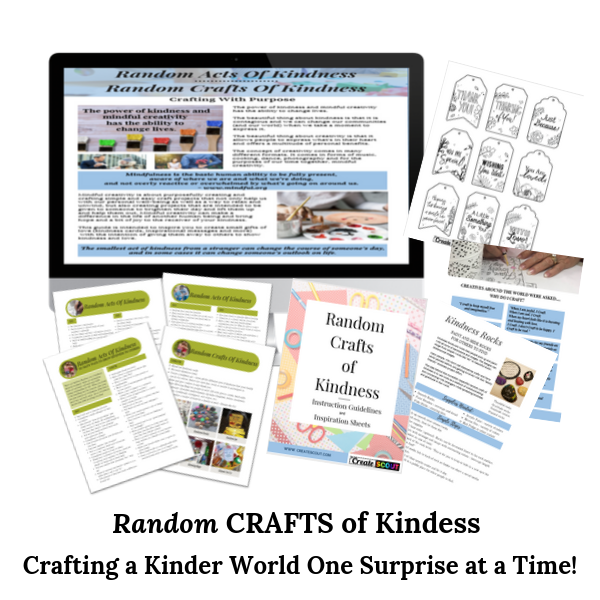
Donate unused craft supplies to a charity that could benefit from them – Acts of Kindness open our hearts in many ways

Write a happy message on a sticky note and leave it for someone to find it – someone left a “you are special” sticky on my drivers side window and it absolutely made my day

Make up a story about people you see walking on the street – I’ve done this with my kiddos, but it is also such a fun creative activity when you are out and about – Make it silly or outrageous

Choreograph a dance – Remember the song by Lee Ann Womack, “I Hope You Dance” – Life is precious so…dance.

Journal or write something somewhere every day

Making a paper chain to count down the days to an upcoming event or occassion can build excitement

Have an art picnic – Don’t know what that means? Then make it up

Select one of the five senses and document everything you experience with that sense for one day

Listen to music instead of watching TV

Make a mass handmade gift to give everyone for Christmas or some other holiday (personalize eac one)

Teach someone something (or make your own tutorial)

Celebrate weird and unusual holidays. Here’s a list, just in case you need some help with this one

Have an unbirthday party for someone

Execute an elaborate Random Act of Kindness – This can be for someone you know or a complete stranger

Incorporate every color of the rainbow into your outfit

Journal for ten minues straight – do not stop writing

Write thank you cards for your friends family, or coworks – not for gifts, or anthing else

Have a yard sale where you sell handmade things not just a rummange sale

Plan a surprise for someone

Bedazzle something

Measure something really large with something that’s not a ruler or other traditional form of measurment

Decorate mirrors with dry erase markers – Just make sure you use the dry erase markers 🙂

Dress up super fancy on ordinary days – sometimes doing the unordinary on ordinary days can offer you a multitude of more ways to celebrate life

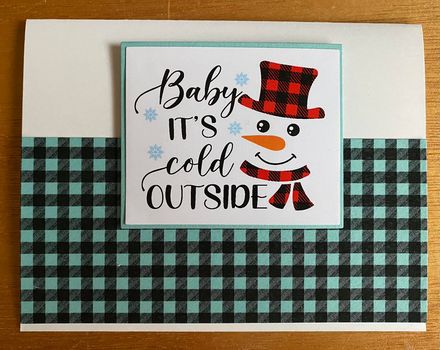
Make paper snowflakes out of colored paper

Document your week in paper scraps – Spell words, make pictures or anything that comes to your mind

Meet up with other people who want to be creative and create a group project or just brainstorm ways to make pretty things for yourself or others

Daydream – allow your mind to just freely wander and have fun – This is actually very therapeutic

Take a road trip somewhere within 90 minutes, but to somewhere you’ve never been before

Doodle – Did you know that Thomas Jefferson, Theodore Roosevelt, John F. Kennedy, and Ronald Reagan were doodlers?

Play video games with your kiddos

Become an Expert – Decide on something that you want to learn and then commit time, daily for multiple weeks – Document your progress by dating any writings or videoing visual progress

Take risks – When it comes to building your creative skills, you need to be willing to take risks in order to advance your abilities. While your efforts may not lead to success every time, you will still be boosting your creative talents and building skills that will serve you well in the future.

Keep a creativity journal – Using either blank or lined papers follow your creative process and track the ideas you produce. A journal is a great way to reflect back on what you have accomplished – This journal can be used to save ideas that can later serve as future inspiration.

Challenge yourslf and create opportunities – Remember to not only thingk big, but it’s also okay to think small as well – Meaning all ideas create opportunity

Make time for creativity – You won’t be able to develop your creative talents if you don’t make time for them. Schedule some time each week to concentrate on some type of creative project

Brainstorm new ideas – AKA do a brain dump – Set yourself a specific amount of time and just start writing all the things you want to make or do or see – This is not about the how it’s going to happen, it’s all about the ideas

Look for inspiration – Never expect creativity to just happen – Look for new sources of inspiration that give you fresh ideas – Ex: Read a book, visit a museum, listen to your favorite music – Utilize whatever strategy or technique works best for you.

Now that January 2022 is in our past, where do we creatively go from here? That’s the exciting thing. There is so much creativity waiting to be explored and well, created.

Your personal creative journey is waiting.

Filed Under: Paper Crafts

Creative Decorating Tips From A 5-Year-Old

January 30, 2022 By Lynn Leusch 2 Comments

Do you remember Art Linkletter? He was a variety/talk show host many moons ago, that was famous for coining the phrase “Kids Say The Darndest Things.”

Art Linkletter – Kids Say The Darndest Things

In his show, House Party he would ask questions to kids, and the tv audience would roar with laughter by the responses these kiddos would say. The show’s popularity led to his first book entitled Kids Say the Darndest Things (1957).

Kids still say the darndest things (by the way that was the title of his 2nd book on the subject), but sometimes not only do they say the darndest things but what they say can be quite profound.

Cretive Life Lessons Learned From a 5-Year-Old

Some time ago I heard a story about a grandmother who learned some great life lessons from her 5-year-old grandson.

This kiddo was sharing some decorating ideas and was explaining why certain things must be certain ways. Not only does his charming view of the world bring some pretty valuable life lessons, but I also find that these lessons are a perfect correlation to our creative lives as well.

Below are a few creative tips as told to a grandmother of a 5-year-old. This grandma was helping her grandchild decorate his room and these life reflections are some of the best I’ve heard that I want to share with you.

“You should use your favorite color a lot.”

Why didn’t I think of that? If you like pink or green or red, don’t be afraid to use it as much as you can. Color is such a great mood setter. Did you know that color psychology is a real thing?

Yes, there are many studies that show the power of color. The London Image Institute has an interesting read on the power of colors and their meanings.

One thing I know is when I wear and/or create using my favorite color (or colors), I am energized and feel happier.

My favorite color is purple. What is your favorite color?

“If you don’t like a color, don’t use it.“

It doesn’t matter what anyone says is popular…if you don’t like it, don’t use it. Nuff said.

The other day I wrote a post about Color Theory and shared that the 2022 Pantone Color of the Year is Very Peri. I happen to love this color. However, even if this is touted as an amazing color and I didn’t like it…I just won’t use it.

Makes sense to me. Smart kid, right?

“You need room to put all your good stuff out where you can see it and play with it.“

Absolutely! Don’t store your treasures away, display them! As a crafter, I know all too well that if I don’t have visible and direct access to the many wonderful products and tools that I have accumulated, I won’t use them.

How does a 5-year-old get this and yet as an adult, we forget the importance of this great tip?

I realize that not everyone has the ability to leave things out to have easy access. But, if at all possible, I highly suggest having your crafty treasures easily accessible so you use them often.

“When you get tired of something, hide it somewhere, and then when you find it again, you won’t be tired of it anymore”.

I honestly have to giggle at this one, because this is such a profound idea.

Now, I may not have ever purposefully hidden something and then “found it”. But, I can totally relate to how re-excited I get when I do come across that long-lost item that I had given up ever finding again after putting it in a “safe place” so I wouldn’t forget where it was.

Can you relate to this one?

“Moms like fancy pillows. Kids don’t unless they can throw them, and then you get in trouble”.

Yeah, I remember my mom not liking my sister and me throwing her pillows at each other. Sometimes moms are just so unreasonable. LOL

This take-away is a good-good reminder. Decorate a room for the person living (crafting) there.

Kids don’t want fancy pillows that they can’t “play with, so don’t decorate with fancy pillows, right?

I have found myself on several occasions scouting around online looking at some amazingly beautiful craft and work areas and become a bit jealous because they are impeccable, clean, and…well just awesome.

The reality is, even though they are beautiful, I’m really OK with my simple set-up. It works for me. Do I dream about the beautifully decorated craft rooms? Sure. But, I’m ok with what I have. My creative space doesn’t have fancy pillows, but it is all me.

“You have to have a light by the door that you can turn on to check for monsters at night.”

This is an important and insightful tip. So much wisdom from this 5-year-old.

Lighting is VERY important. Not just for checking for monsters at night, but it’s also important in every creative endeavor.

On a few occasions, when my lighting has not been as good as it should have been, I have made some pretty interesting not-so-good color combinations. I thought the colors matched. But, when I took the project into a better lit area…Not so much.

Yes, good lighting by the door is good for checking for monsters and making sure you make the right color combinations.

“Flashlights are cool and you need someplace to put one where you can always find it if you remember to put it back.”

Can I get an Amen? Organized storage is indeed effective if you use it.

Effective organization is a Nemesis of mine. My honey is so good at always putting things away once he is finished with it. Me? Not so much! And I pay for it the next time I sit down to create because I’m frustrated for not being able to locate that one item I need to work on a project.

Whether it’s a flashlight or that favorite roll of ribbon, it’s got to be put back when you’re done with it, so you can find it again when you need it.

“Sometimes you change your mind about what you like“.

So true! Even as adults, we change our minds about what we like. And that’s okay!

In my lifetime I have transitioned through many different styles and genres of creativity. And like many others whom I’ve chatted with, I have accumulated oodles of “stuff” over the years.

I’m currently in one of those creative transitions myself. As I learn new creative techniques I find myself not needing some of the old tools and products that I have had for years. It’s sometimes difficult to let go, but I’m learning that is indeed OKAY to move on to new things that are exciting and new.

In Closing…

Colors, flashlights, pillows, and monsters have a very unique perspective in the mind of a 5-year-old. And yet those of us who are well past the single-digit age group can find ourselves very enlightened by such profound wisdom.

I hope this brings you a giggle or two, but more importantly, I hope it reminds you that even though kids say the darndest things, we can learn so much from them.

HUGS!

Filed Under: Paper Crafts

Playdough Playtime – Family Style

January 29, 2022 By Lynn Leusch 5 Comments

Today’s post is about a silly and fun creative moment I enjoyed experiencing with my family.

My family’s Christmas 2021 gathering had to be postponed due to illness. It was sad that we weren’t able to get together at that time, but we rescheduled our get-together for January 2022.

As always it was wonderful seeing my family. I know that the specific date isn’t the most important thing. It’s all about the time spent with each other.

So I had planned a little silly “game” for us to play right after dinner and right before we gathered together to open presents.

I wrapped little containers of playdough for each family member. These little pods of playdough came in many different colors.

Two sons, one daughter-in-love, my granddaughter, and two uncles got to pick one of the presents and after opening, I told them they could exchange one color if they wanted. Everyone kept the color they received.

Additionally, I gave them each a set of plastic utensils for detailed creativity and a paper plate to work on.

The rules were simple. They needed to create an ornament with their playdough. I didn’t tell them anything more than that.

As the senior mom of this group, I am proud to call family, I so enjoyed watching the creative process in action by each participant.

After about 20 minutes of intense creativity. The clock stopped and their projects were submitted.

I then told them that by show of applause we would come to the conclusion of a winner. The winner got to open the first Christmas present of the night.

I know…not an outstanding prize, right? Ultimately I just wanted this to be a fun creative moment together that we had never done before.

Here are the family submissions:

I giggle with pride every time I look at these.

A Happy Mushroom, 2021/2022 Rona Ornament, Peanut Butter Cookies, Christmas Tree, Christmas Cookie Monster, Candy Cane Love, and well…the last one was my honey’s ornament and he couldn’t give me a name for his creation (lol).

By a rousing sound of applause and cheers for all who participated, the winner of opening the first Christmas present of the night went to. Drum Roll, please…

My granddaughter Sarah! Way to go sweetheart!

My hope is that as you read through this you might be inspired to do silly things with family in hopes to build fond memories for years to come.

Everyone was great sports about this silly and fun playtime. I know it brought pure joy to my heart for their willingness to make and ole’ lady happy.

Hugs!

Filed Under: Paper Crafts

Glue Gun Essentials – Tips, Tricks & Hacks

January 28, 2022 By Lynn Leusch 2 Comments

I believe a glue gun in your craft room is an essential craft tool. I find myself pulling out my glue gun often to finish up and create projects in addition to “fixing” household oopsies.

Glue guns have the ability to attach almost anything to almost anything else. Glass to wood and paper to…well just about anything.

Hot glue is also a very good alternate glue to some of the others that have toxic odors. Yes, E6000 has a useful place in my work area for certain specialty projects, but hot glue is often my first choice.

There are a few potential drawbacks to hot glue that is something to be aware of. Firstly, hot glue is…well HOT and the user has a risk of getting burned. It will happen for sure, but the more caution you take when using it the fewer blisters you will experience.

Another drawback but not as painful for sure, is that glue guns require electricity however, some newer models are battery operated. Having to be plugged in can sometimes make it a bit cumbersome to take with you to crops and retreats.

Watercolor photo created by freepik – www.freepik.coma

Types Of Glue Guns

Hot glue guns are typically available in three options: high, low, and dual temp. They also come in different sizes.

Basically, the important thing to know is that the higher the temperature of the glue the stronger your project will stay together.

Which glue gun you decide to use should be determined by what you are planning on doing with the glue gun. What types of materials will you be using?

Selecting the right one will depend on the project you are working on and what you want to accomplish. It’s important when using a glue gun that you chose the right one for the job.

If you plan on doing a lot of different types of craft projects you will likely want to have both types of glue guns at your disposal. It’s no fun to begin a project to then find out that you don’t have the right tools for the job. So having both available is a great way to plan ahead.

Low Temp Guns
Heats up to between 150 – 250 degrees.
A low temp gun works best for delicate items that have the potential of getting damaged or have the possibility of melting.

Low temp glue works best on delicate materials. It will not melt or burn materials like Mylar, styrofoam, nylon, etc. Low temp glue is also best used with ribbon or foil, where the glue can possibly seep through while working.

It’s good to note that low temp hot glue can much more easily soften and come apart on hot days.

Don’t be fooled, just because it is a “low temp” glue gun, does not mean that it won’t burn you. You still need to always be careful when using them.

High Temp Guns
These operate at 380 degrees are higher. Higher temp glue is best used for more durable projects like glass, metal, wood, and floral pieces.

Glue Sticks

Another notable thing to be aware of when deciding which type of glue gun you want to use is to make sure you purchase the right kind of glue sticks for the glue gun you own. Glue sticks come in low temp and high temp versions.

Miniature glue guns will not work with standard-sized glue sticks and vice versa.

You will want to make sure you know the size tip that is on your glue gun so you purchase the right size.

It can be quite frustrating when you don’t have the right type of glue or size glue stick when you get ready to create.

Hot Glue Craft Tips, Tricks And Ideas

People photo created by freepik – www.freepik.com

Keeping glue sticks in the freezer can help prevent long string bands when gluing. Those long glue strands can be annoying. Especially if you have a lot of gluing to do.

The heat from a hairdryer removes strings. Simply blow-dry finished projects to remove hot glue strings.

Need to reposition hot glued items? Use an embossing gun to warm up the glue and loosen the glued area up.

Before you start working on your project allow the glue gun to fully warm up before attempting to use it. The glue will work better the hotter it is! If the glue gun is not hot enough before using it, the glue will not have a steady flow.

Hold your glue gun close to the project you are working with. Pull the trigger just long enough to get the amount of glue you want and then release the trigger. Tip the gun sideways and pull away to prevent long strands of glue.

When adding glue to a certain material or surface for the first time, do a spot test to make sure it works the way you intend it to work. This will also allow you to confirm whether you need low-temp or high-temp glue.

Many glue guns have a kickstand to allow you to place the unused gun upright. However, you will also want to have something to catch your glue drips. There are many glue gun mats and tools that are made for this specific purpose. You can easily use a kitchen dish but plan on making it a dedicated dish because won’t want to clean it after use.

Hot glue does have a cooling downtime. It doesn’t take long, but do make sure you allow your glued projects to completely cool down before moving them around.

Remember a hot glue gun is…Hot. Always take care when in use.

Fun Hot Glue Projects (Resources)

I also use a hot glue gun to create texture on art projects. You can actually “draw” with it. Here are some ideas:

Glue gun snowflakes – Using this technique you can make many different shapes using your hot glue.

Hot glue crayon rubbings – Similar technique as above, but using crayons to add color.

Glue gun cabochons – You could have so much fun making all kinds of embellishments with this little gem of an idea.

Harry Potter wands – Even though this tutorial has been around for quite some time, I think it’s a top creative genius idea.

Collection of glue gun ideas – Many ideas to get inspired

Mixed media – drawing with hot glue – video

Make scrap pads – Love this next idea so much, I didn’t want to just link it, I also wanted to share it directly on this post. This is a great tip for paper crafters. I’m gonna be trying this one out for sure.

I hope this list of ideas, tips, and hacks is helpful to you. Have any other ideas you like to use a glue gun for? Please share. Because you know…sharing is caring.

Filed Under: Paper Crafts

One Sheet Wonder Valentine’s Day Cards

January 27, 2022 By Lynn Leusch 2 Comments

Today I’m excited to share with you more One Sheet Wonder (OSW) card creations that were created using the One Sheet Wonder – Full Die System™.

Every time I create using the dies from this system, I get re-energized to make cards because it’s SO EASY to get my projects done quickly and easily.

These projects are highlighting one of the newest paper collections from The Stamp Doctor. The Buffalo Plain Valentine’s Day paper collection is right up there with one of my top favorite collections. It’s ok that my top fave list keeps growing, right? LOL

The top two rows of ten cards from both the red and pink card collections below were made using the original OSW 8.5″ x 11″ system.

The last row of three cards and one tag were made using the 6″ x 6″ die system.

Buffalo Plaid Valentine’s Red
Buffalo Plaid Valentine’s Pink

Easy Steps For Card Creation

Die-cut Buffalo Printed paper (red or pink) using …
Die-cut solid cardstock (black) using large die…
Die-cut the sentiment sheet pieces using the small sentiment die from the OSW system.
Die-cut the black cardstock using the large sentiment die from the OSW system.
Adhere the correlating shaped papers together. Example: printed triangle on top of the black triangle.
Adhere the sentiment pieces on top of the correlating black cardstock pieces.
Add these shapes onto card bases. Use the card sketch layout samples provided with the OSW system or create your own layouts. The options are numerous.
Place the sentiment shapes onto your newly created card bases using either adhesive or foam squares to pop them up.

Paper Options

Mechele, from The Stamp Doctor, offers multiple ways to access her fun prints and sentiment sheets. I wanted to walk you through some of the options you will have available when accessing the papers she offers.

NOTE: This post is showcasing the Valentine’s Day Prints. However, I want to clarify that there are many different themes available to choose from. Her paper offerings continue to grow, so I want you to be informed on how each offering can help your paper crafting options.

Pre-Printed Papers

Pre-printed papers are printed by The Stamp Doctor (TSD) and mailed directly to you.

Note: the images provided here only represent one theme. There are multiple other themes (and growing) available on the TSD site.

Card Kits

This card kit comes in red and pink

The pre-cut card kits make 7 cards ready for you to assemble. Card Kits come in A2 format and Slimline format.

You will receive:
• Card Bases & Envelopes
• One Sheet Wonder pieces & backers
• One Sheet Wonder Sentiment pieces & backers
• Sketches (instructions) to create each card

Individual Printed Papers

Also available in red

Individual printed papers are mailed directly to you. Mix and match the individual designs you want to purchase. Available in multiple themes. These prints are designed to be used with the OSW die systems and work beautifully for your own individual creative layouts.

Individual Printed Sentiment Sheets

Individual printed sentiment sheets are mailed directly to you. Available in a variety of different styles and themes.

These sentiment sheets are designed to fit the OSW sentiment die which is part of the OSW die system. However, you could easily use a paper trimmer and/or dies to cut them apart and use them on your card creations.

Digital Designs

Digital designs are also known as Digi prints. The great thing about digital prints is that once you make a purchase you can print multiple copies to use. For those who have a printer, this is a great choice.

Digital Print Collections

Digital Paper Packs

Paper packs have the greatest value for the price. This gives you multiple prints and a matching themed sentiment sheet.

NOTE: The Buffalo Plaid digital print gives you the opportunity to print on any lighter colored cardstock giving you endless possibilities for this particular print. The sentiment sheet that comes with this particular paper pack will only print with the color that shows, but this Buffalo Print is wonderful.

Digital Single Sheets

This is your opportunity to purchase individual printed paper and sentiment sheets.

NOTE: The Buffalo Plaid digital print gives you the opportunity to print on any lighter colored cardstock giving you endless possibilities for this particular print.

Sample: this blue plaid was printed on blue cardstock

Resources

Click the link for more details on the One Sheet Wonder – Full Die System™

Click the link to access the Buffalo Print Papers

Click the link to access OSW Print Papers

Compensated affiliate links may be used at no cost to you.

Filed Under: Paper Crafts

Totally Tiffany – Buddy Bag Reviews

January 26, 2022 By Lynn Leusch 2 Comments

Picture Credit: https://totally-tiffany.com/

I discovered long ago that the more organized my crafting supplies and tools are, the more productive I am when I sit down to create.

One of the many awesome things that happen when crafters get together is we share with each other all the new goodies we purchase and then become the envy of the crafting table. And other times we can sit across the table from someone and catch a glimpse of something that sparks our interest that we must explore further.

The Totally Tiffany (TT) bags were one of those discoveries for me. I kept seeing my fellow crafters pulling out these adorable little see-through bags that contained lots of goodies inside. In every instance someone shared their little bag with me, they were excited to show how perfectly their “xyz” craft items fit inside the bag. Because the bags come in a variety of sizes there’s something that fulfills many crafters’ needs.

I was gifted a Buddy Bag a while back and I’m now hooked. These bags are made of strong clear vinyl material and many of them come with a hard plastic box that is easy to assemble which strengthens the container.

According to their site, the Tiffany brand was created in 2003 by Tiffany Spaulding. She needed a way to store all of her items while crafting on her dining room table.

These containers are a great asset to help organize a craft area keeping like items together and at the same time are easy to grab off a shelf/table and fit perfectly inside a tote bag to take to a crop and crafting event away from home.

The TT company has really done a great job in knowing what their customer base wants and needs.

This Totally Tiffany video comes from a Live Stream that was done covering their Buddy Bags. The company has so many different styles and sizes of bags, but I wanted to specifically share the Buddy Bags because of their great versatility to keep all of our craft tools and supplies together and easily accessible.

The above video gives a great overview of how their products work beautifully together.

Below are some independent blog and video reviews that I discovered during my research.

I enjoy shining a spotlight on others who I feel offer good tips, ideas, and training that I think will help you in your crafting journey as well.

Blog Reviews

Review of the Gail Buddy Bag from stamping.craftgossip.com – This review talks about the height of the bag being just the right size for taller items such as ink sprays, and spritzer bottles. There is also a quick video available to view that gives a nice walk-through of many different products that this bag could hold.

Mindy from mycreativescoop.com reviews the Ultimate Shoppin’ & Croppin’ Tote from Totally TIffany, but does a really nice job of the buddy bags that fit inside of it and how beautifully all the totes keep all of her crafting tools and supplies well organized.

A nice blog review by Jennifer Evens of createoften.com for the Gail Buddy Bag. Jennifer shares that this bag is easy to clean and can be used for a multitude of purposes.

Video Reviews

Lisa Mears Designs video – Lisa does a really nice overview of many of the Totally Tiffany storage products.

Product Review – Totally Tiffany Deanna Organizer – This video review of the Dianna Organizer dates back to 2016 and from my research, this specific bag is not currently available. However, the creator does a nice review. Other Totally Tiffany bags are similar but in different sizes, so this video shows the quality and general versatility of their bags.

The Totally Tiffany company does a great job of demonstrating the versatility and quality of their tote bags.

As you can see the Buddy Bags come in a variety of sizes and shapes to select from. I have not yet discovered how they come up with the bag names, but be assured that I am on the lookout to discover it.

  • Totally Tiffany - Punch Pack - 1.5 Inches
  • Price: $9.49
  • Totally Tiffany - Crazy for Card Making Set
  • Price: $16.14
  • Totally Tiffany - Stamp Store and Go with Tray - Double Sided
  • Price: $14.24
  • Totally Tiffany - Punch Pack - 2 Inches
  • Price: $9.97
  • Totally Tiffany - Stamp Store and Go with Tray - Single Sided
  • Price: $7.59
  • Totally Tiffany - Buddy Bag - Sue
  • Price: $7.59
  • Totally Tiffany - Buddy Bag - Irene
  • Price: $6.64
  • Totally Tiffany - Buddy Bag - Barbara
  • Price: $6.64
  • Totally Tiffany - Buddy Bag - Dawn
  • Price: $6.64
  • Totally Tiffany - Buddy Bag - Brandy
  • Price: $6.64
  • Totally Tiffany - Buddy Bag - Terri
  • Price: $6.64
  • Totally Tiffany - Buddy Bag - Denise
  • Price: $9.49
  • Totally Tiffany - Buddy Bag - Leanne
  • Price: $9.49
  • Totally Tiffany - Buddy Bag - Katya
  • Price: $9.02
  • Totally Tiffany - Buddy Bag - Myrel
  • Price: $7.59
  • Totally Tiffany - Buddy Bag - Monica
  • Price: $7.59
  • Totally Tiffany - Buddy Bag - Edna
  • Price: $7.59
  • Totally Tiffany - Buddy Bag - Gail
  • Price: $7.59
  • Totally Tiffany - Buddy Bag - Teresa
  • Price: $7.59
  • Totally Tiffany - Buddy Bag - Shelly
  • Price: $7.59
  • Totally Tiffany - Buddy Bag - Debra
  • Price: $7.59
  • Totally Tiffany - Buddy Bag - Lisa
  • Price: $14.24
  • Totally Tiffany - Tote Bag - Nancy
  • Price: $16.14
  • Totally Tiffany - Storage and Supply Case - 2 Drawers
  • Price: $15.19
  • Totally Tiffany - Storage and Supply Case - 4 Drawers
  • Price: $16.14
  • Totally Tiffany - Storage and Supply Case - 6 Drawers
  • Price: $17.09
  • Totally Tiffany - Buddy Bag - Kirstin
  • Price: $15.19
  • Totally Tiffany - Buddy Bag - Katie
  • Price: $12.34
  • Totally Tiffany - The Paper Taker - Storage and Supply Case - 8.5 x 11
  • Price: $14.24
  • Totally Tiffany - Storage and Supply Case - 8 Drawers
  • Price: $18.04
  • Totally Tiffany - Buddy Bag - Karen
  • Price: $9.02
  • Totally Tiffany - Triangle Traveler - Black
  • Price: $28.49
  • Totally Tiffany - The Paper Taker - Storage and Supply Case - 12 x 12
  • Price: $18.04
  • Totally Tiffany - The Paper Taker - Storage and Supply Case - 5 x 7
  • Price: $11.39
  • Totally Tiffany - The Paper Taker - Storage and Supply Case - 6 x 6
  • Price: $12.34
  • Totally Tiffany - The Paper Taker - Storage and Supply Case - 8 x 8
  • Price: $14.24
  • Totally Tiffany - Buddy Bag - Sara
  • Price: $9.25
  • Totally Tiffany - Buddy Bag - Stephanie
  • Price: $9.25
Page 1 of 2
  • 1
  • 2

Compensated affiliate links may be used  at no cost to you.

Filed Under: Paper Crafts

Next Page »

Primary Sidebar

Recent Posts

  • Ways To Be Creative
  • Creative Decorating Tips From A 5-Year-Old
  • Playdough Playtime – Family Style
  • Glue Gun Essentials – Tips, Tricks & Hacks
  • One Sheet Wonder Valentine’s Day Cards

Recent Comments

  • Atlas_2022 on How To Read A Ruler
  • Glenda Cates on Creative Decorating Tips From A 5-Year-Old
  • Martha on Creative Decorating Tips From A 5-Year-Old
  • Tamara on Playdough Playtime – Family Style
  • Karen Sammer on Playdough Playtime – Family Style

AFFILIATE DISCLOSURE

Sometimes I make recommendations for books, journals, calendars, other products and resources. The link provided, in many cases, is an affiliate link. This means if you click it and purchase, I will earn a small commission when you take action on a recommendation but you will not pay more. I only promote things I personally use, test, and believe in.

Footer

Meet The Blogger

My desire to scout around and discover all forms of creative outlets has led me to introduce you to Create Scout. It takes so much time to discover and find new inspiration, so here at createscout.com, I will work hard to find and bring you the old, the new, the trendy and innovative ways to make pretty things.

Copyright © 2025 · Hosted by Mom Webs Hosting · Log in